Mastering the Art of FormBoss® Setup: A DIY Installation Guide
Our DIY Guides
From intricate landscaping edging projects to simple garden hacks, delve deeper into a world of hands-on creativity. Each guide is packed with expert advice, ensuring that your next DIY endeavor not only meets but exceeds expectations.
Profile Heights
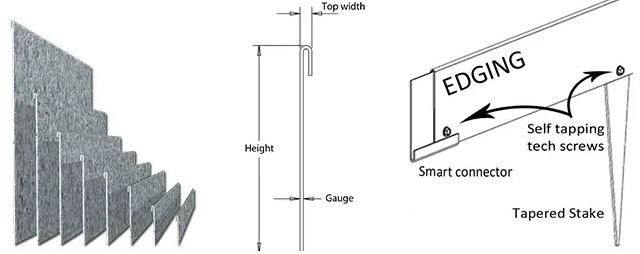
Understanding profile heights is crucial for achieving the desired look and functionality in garden edging.
Garden Edging Tools
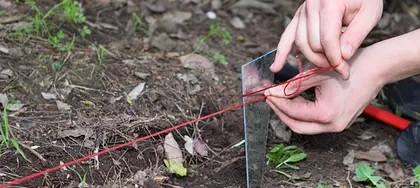
The right tools can make all the difference in garden edging. Dive into our curated list of essential tools, each designed to simplify and enhance the installation process.
Stakes and Connectors
DIY Installation References
A step-by-step video tutorial on effortless journey of assembling and installing FormBoss® edging profiles.

From preparation to finishing touches, this resource ensures you have all the information at your fingertips for a successful and enduring setup. Dive in and discover the nuances of metal edging installation.
A video tutorial on the easy and straightforward installation of FormBoss® Planter Rings
Setting Up Retaining Edges
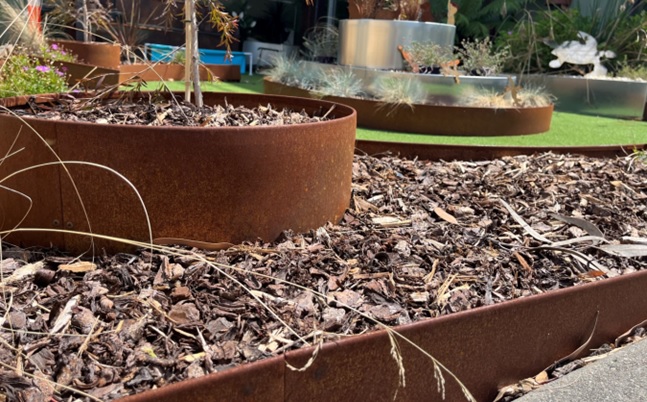
When working with FormBoss® steel garden edging profiles taller than 290mm, there are some variations in the installation process. Although it might require a tad more effort compared to the standard edging systems, the result is visually stunning. These retaining edging profiles come in heights of 290, 390, and 580mm and can be used for:
- Custom-shaped raised planter beds
- Steps
- Barriers against invasive grasses
- Retaining walls
- Designer gardens
- And more…
Bending Profiles Above 290mm
The larger edging profiles can be shaped more sharply without causing any deformities to the top edge. This is due to the increased steel amount, which adds rigidity. For tighter curves, especially towards the end, you might need an extra pair of hands. If you struggle with the last 20cm, you can shape the edges, trim the end, and use the trimmed piece as a connector.
Creating Corners & Angles
Forming angles on-site with larger profiles (230-580mm) can be challenging due to their enhanced strength. We suggest buying a pre-made corner piece for a hassle-free installation.
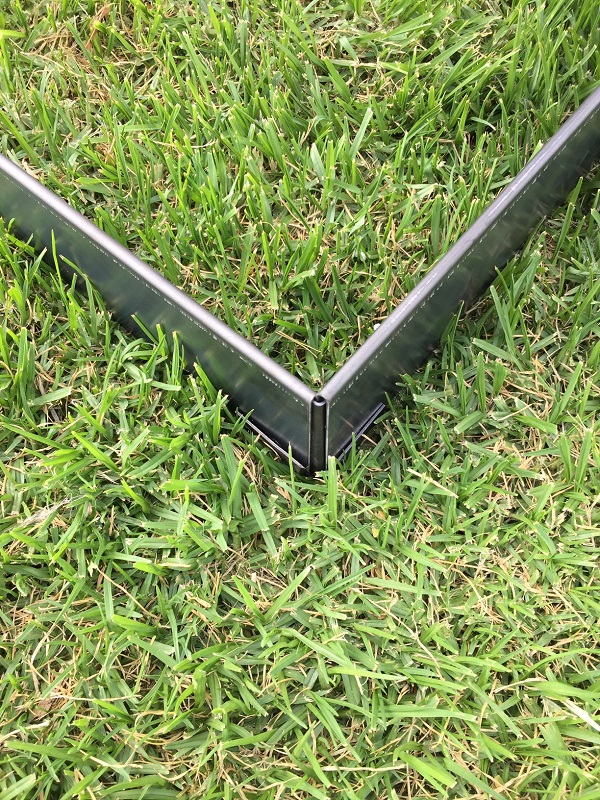
For taller planter boxes, we advise having them pre-fabricated from straight lengths. This results in fewer joints, ensuring a sturdier structure. You can bend the edging to form smooth corners for smaller profiles (75-185mm). If you need to create an angle on-site, clamp a piece of wood to the desired angle location on the edging and apply force to bend it. A rubber mallet can help refine the angle.
Making Seamless Connections
Align the edges end-to-end, ensuring they overlap slightly for added strength. Secure them using appropriate connectors or screws, making sure the connection is tight and seamless. However, for the 580mm high edging, which can slightly bow in the middle, consider using pop rivets for a cleaner finish instead of extra screws.

Staking
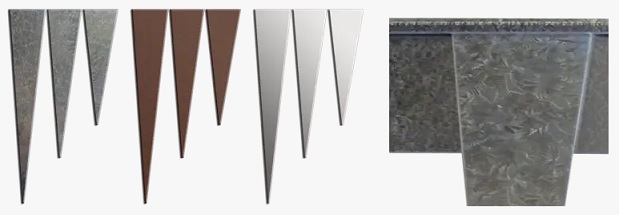
The standard ‘triangle’ taped stakes aren’t suitable for these profiles. Instead, we’ve designed ‘L’ profiled angled stakes that fit under the edging lip and offer enhanced strength.
These stakes are versatile and come in various lengths to perfectly match your project requirements. They can be effortlessly trimmed to the desired size if you find them longer than needed. When installing these stakes, it’s crucial to use a rubber mallet. Avoid using metal hammers as they can cause dents in the steel. For securing these angled stakes, you’ll need two self-tapping screws, which is a deviation from the standard single screw requirement.
Preserving Your Retaining Edges
Ensuring the longevity of your edging systems is paramount, especially when dealing with raised garden beds and planter beds. Given the frequent watering of plants, the inner side of the steel is often damp. This constant moisture can accelerate corrosion, especially in REDCOR® steel, potentially reducing lifespan. Here are some comprehensive methods to enhance the preservation of your project
Ensure Proper Drainage and Water Penetrability
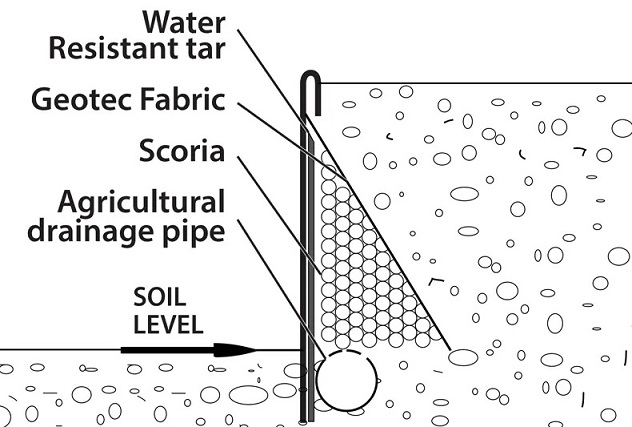
A primary concern when installing retaining edges is ensuring proper drainage. Water exerts significant pressure when accumulated, and over time, this can cause the retaining edging to deform or even collapse. It’s essential to have an effective drainage system to prevent water buildup behind it.
Enhancing water penetrability is also vital to prevent the steel from being constantly wet. A few methods to achieve this include:
- Applying a bitumen backing on the inner side of the edge to act as a barrier against moisture.
- Using a quality geotec fabric as a physical barrier to prevent direct contact with moisture.
Consult Experts
Every project has its unique challenges. It’s always a good idea to consult with a landscaping expert or architect to get tailored advice for your project. They can provide insights into the best drainage options and other preservation techniques.
Be Mindful Of Warranty Terms And Conditions
It’s essential to understand that our 10-year structural warranty comes with certain conditions. Specifically, if you have edging profiles that exceed 290mm in height, they require specific maintenance measures. Failing to adhere to these preservation guidelines could result in the warranty not being applicable. Always ensure you’re familiar with the care requirements to keep your warranty valid.
Creating Steps with REDCOR
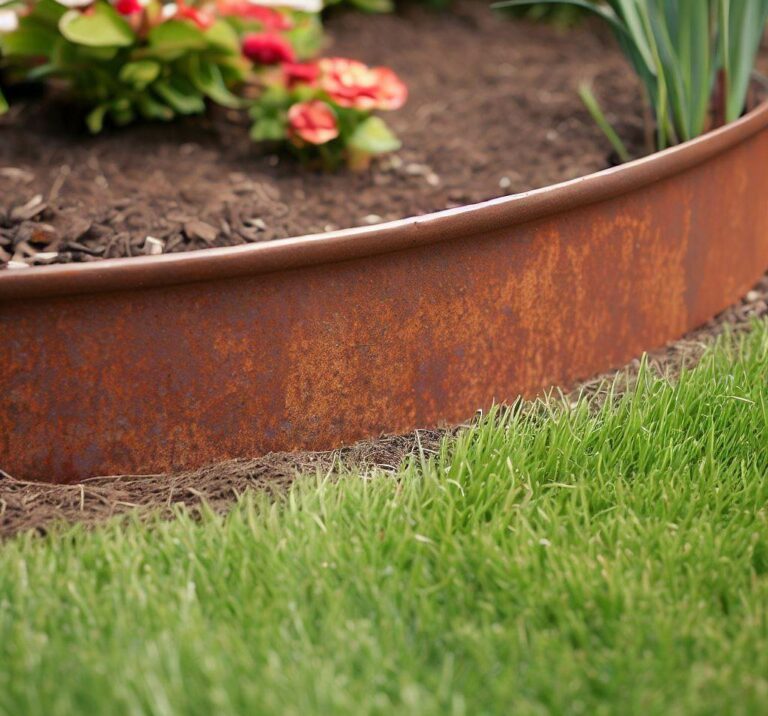
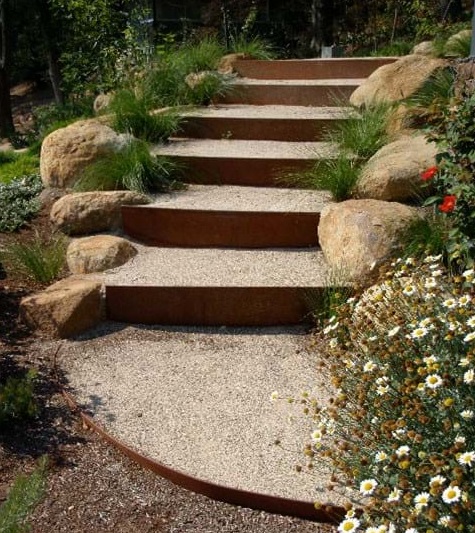
FormBoss® metal edging profiles can be used to craft durable step faces. They’re especially popular in our REDCOR® Corten Steel Edging variant due to its textured, weathered appearance, providing a natural anti-slip surface. The installation process is similar to standard installations, except this time opt for angled stakes at least double the height of your chosen edging profile to ensure the best anchorage.
Also, keep in mind the following:
- While the typical stake spacing for standard edging is three per length or 800mm apart, we advise a slightly denser arrangement: four stakes per length or spaced 600mm apart. Consider a tighter 400mm spacing for enhanced sturdiness in areas with high foot traffic.
- Instead of 30%, bury approximately 40% of your edging depth. This approach offers the edging a more robust foundation, ensuring its durability over the years.
- To bolster the strength and lifespan of your edging, consider concrete haunching. At the very least, the base of the stakes should be set in concrete. For public spaces like steps or retaining walls, concrete haunching is crucial to maintain the edging’s resilience.
Well-defined and neat steps can elevate the aesthetics of your space. We suggest using a high-quality crushed rock to top off your steps. Not only does crushed rock offer excellent drainage, but it’s also available in various hues. With FormBoss™, you’re in the driver’s seat of your design, allowing for unparalleled creativity!
FAQs From DIY Garden Edgers
These edging lengths are consistently 2.44m.
REDCOR corten steel is delivered with a light grey, somewhat silver hue. To differentiate between various types, refer to these descriptions:
- Galvanised: Silver with a unique speckled pattern.
- ZAM: Bright silver, smooth, resembling stainless steel.
- REDCOR Steel: Light grey with a dark oily residue.
The typical storage method for lengths would cause them to stick together if pre-rusted. This is due to the nature of rust, which can create a rough and textured surface, increasing friction between the corten steel lengths and causing them to cling together. Such adherence could complicate separating them for use and damage the material. Hence, it’s essential to store them in their original state to ensure ease of use and maintain their quality.
The rusting duration varies, ranging from weeks to months, influenced by weather conditions. Rain accelerates rusting while sunlight slows it down. Spraying it with water can hasten the process. A mix of vinegar and water can be applied for a quicker result.
Here are some guidelines for driving self-tapping screws into steel:
- Securely clamp the pieces.
- Use an impact driver or cordless driver with an 8mm Hexhead bit.
- Start with firm pressure and a slow rpm.
- Don’t exceed 3000rpm.
- Pause occasionally to prevent screw tip overheating.
- Lubricate the screw tip to reduce overheating.
- If unsuccessful, consider pre-drilling with a 3mm drill bit.
Each length price includes one connector and the necessary screws. The quantity varies based on the item’s size.
FormBoss® edging is stored with one piece inside another, appearing as a single length when packaged. Connectors are delivered similarly.
No. Chances are, you already possess the necessary tools for installation. However, to make the process even smoother, we offer comprehensive installation kits tailored for any FormBoss® project.
Here’s what’s inside our installation kit:
- 1.2 Kilo Rubber Mallet: Ideal for driving stakes into the ground and leveling the edging.
- Note: Avoid using a sledgehammer directly on the edging or stakes to prevent damage. If you’re dealing with tough soil, consider a post hole digger for angled stakes. Alternatively, place a small wooden block or a spare connector atop the stake and then use a heavier mallet or, as a last resort, a sledgehammer. This method reduces the risk of damaging the stake’s top.
- Wide Brimmed Vice Grip: This tool is a lifesaver when you need to hold the edging, connector, or stake in place during drilling.
- Rubber Forming Strip: This strip simplifies the curving process and minimizes the risk of kinks on tighter curves.
- Tech Screw Drill Bit: Pair this with your drill for effortless screw driving. If you find it challenging to drill screws directly into the edging, pre-drill using a 4.0mm drill bit.
Note: For the galvanized edging, we advise applying cold galvanized spray on all cut and drilled areas. This is crucial because cutting exposes the underlying mild steel, which can rust if left unprotected.
We don’t provide corner connectors as they can weaken the edging. For shorter profiles, we suggest bending the edging for smooth corners. For taller profiles, consider purchasing corner pieces.
The choice of garden stakes depends on the profile and soil type. Specific recommendations are provided for each profile height.
Forming perfect rings can be challenging. We offer a rolling service for this purpose. You can manually shape to about a 1000mm radius for sweeping curves.
The edging’s thinness requires a portion to be buried for stability.
FormBoss derives its strength from its rolled top lip, staking system, and the recommendation to bury a third of its depth.
ZAM has a satin finish, while galvanised steel has a speckled appearance.
ZAM comes with a 15-year guarantee, five years longer than Gal.
Allow up to 10 business days for special orders. Some standard-sized garden rings are in stock and can be checked upon request.
Delivery times vary based on order size and location, but typically within 5-7 days for Melbourne or the Mornington Peninsula areas.

